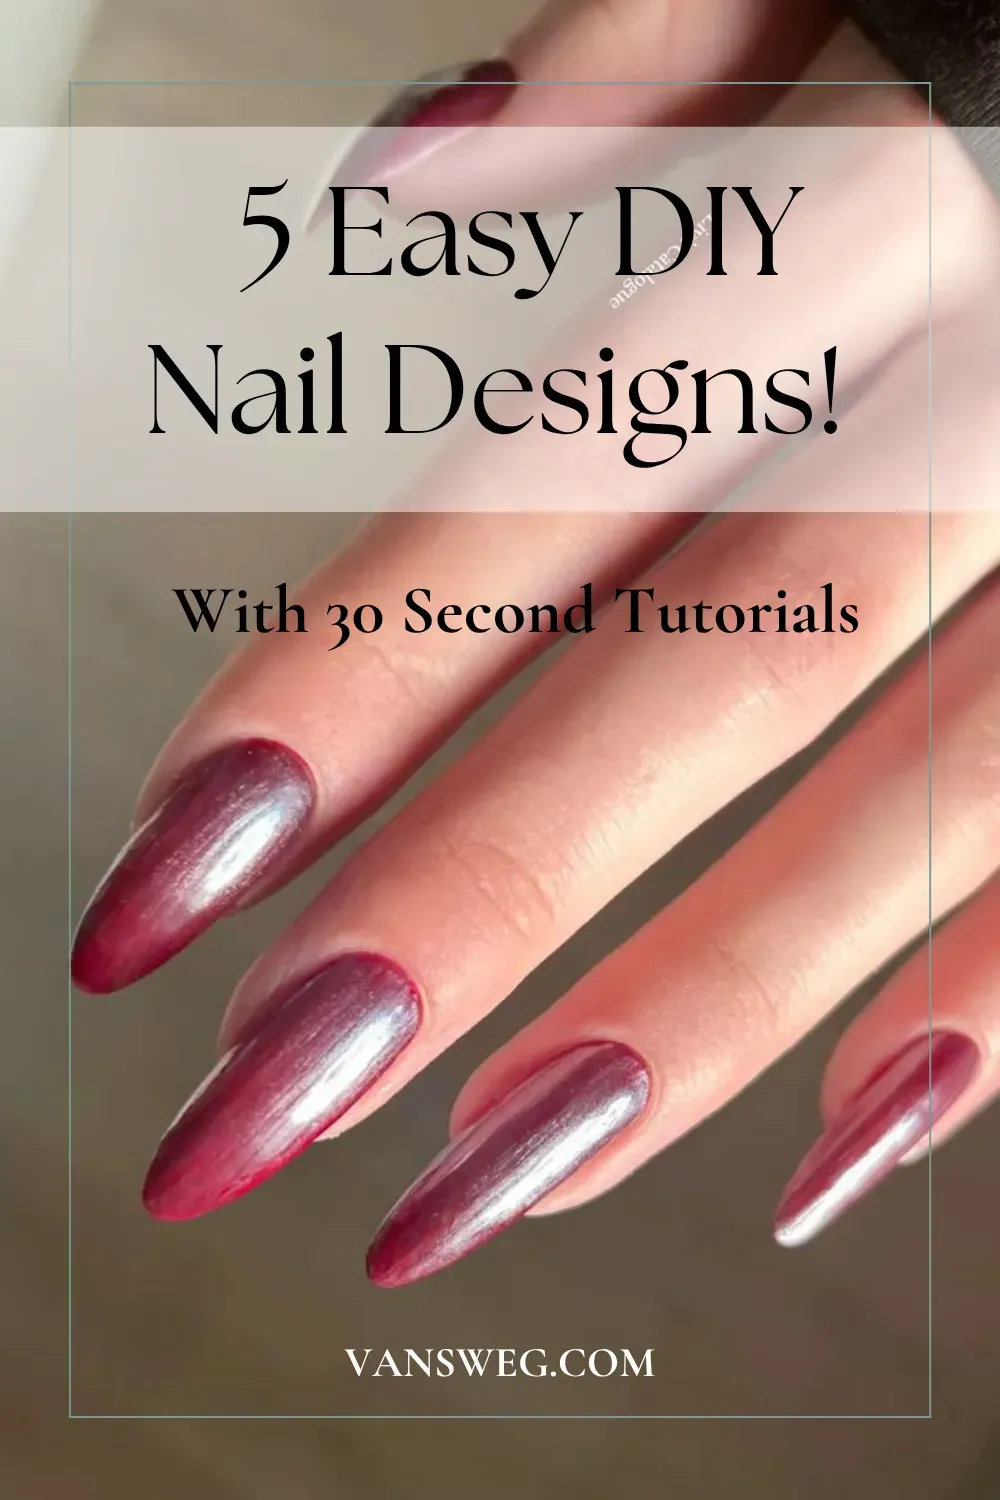
DIY Nail Art for Beginners: 5 Stunning Designs You Can Master at Home

Ditch the Salon: Your 5-Minute Guide to Viral Nail Art
Do you love scrolling through social media and admiring gorgeous nail art, but think those intricate designs are out of your league? Well, think again! We’ve rounded up 5 popular, jaw-dropping nail art hacks that you can easily try at home using everyday items you probably already have lying around. Whether it’s a spooky Halloween marble, a chic chrome ombré, or cute French tips, these simple tricks will have your nails looking like they came straight from the salon.
Ready to level up your nail game? Let’s dive into the easiest DIY tutorials you need to try!
1. The Spooky Halloween Water Marble (Pink & Black)
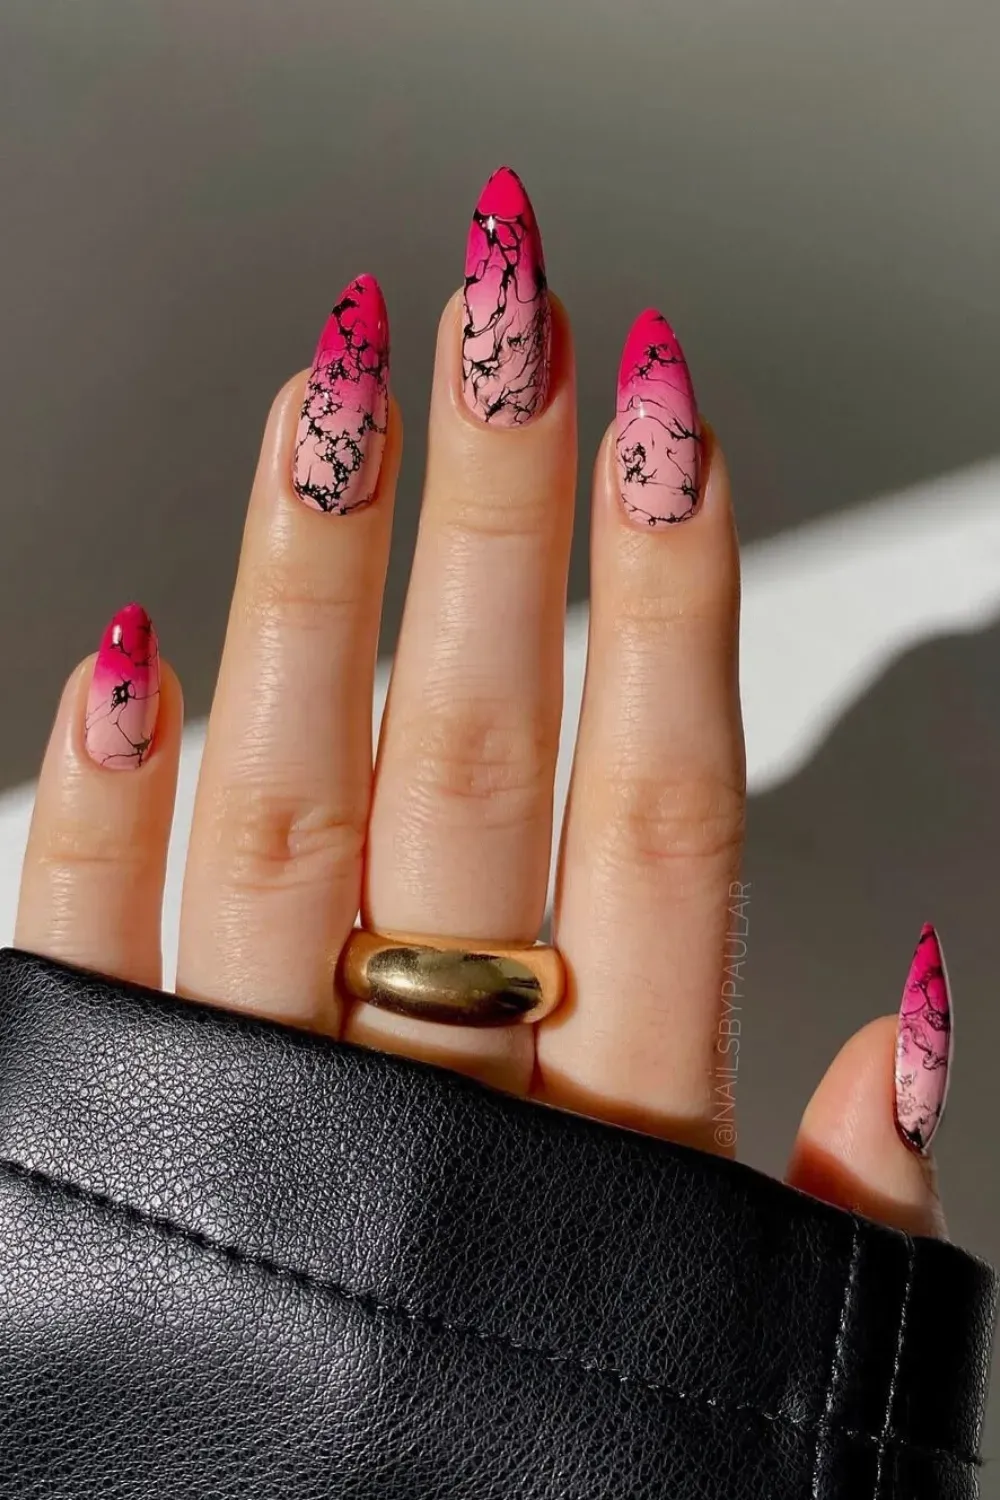
Perfect for Halloween, this eerie marble design is both creepy and stylish, and you can achieve it with just a few drops of nail polish and a cup of water.
What You’ll Need:
- Light Pink Polish (Base)
- Hot Pink Polish (Ombré/Marble)
- Black Polish (Marble effect)
- Base and Top Coat
- Small piece of makeup sponge
- Small cup of water
Tutorial:
- Base Coat: Apply two coats of Light Pink polish and let it dry.
- Ombré: Paint a stripe of Light Pink and Hot Pink onto the makeup sponge. Gently dab it onto your nail to create a vertical ombré effect.
- Marble: Drop a few drops of Black Polish into a cup of water. It will spread out on the surface.
- Transfer: Quickly dip your finger into the water, where the black polish has spread, to transfer the crackling marble effect onto your nail.
- Clean Up & Seal: Wipe away any excess polish on your skin and finish with a glossy top coat.
Watch the Video Tutorial:
2. Sophisticated Grayish Blue Chrome Ombré

This futuristic look blends the trending chrome effect with a smooth ombré, and it’s surprisingly simple to create using a makeup sponge and chrome powder.
What You’ll Need:
- Nude or Light Pink Polish (Base)
- Grayish-Blue Polish
- No-Wipe Gel Top Coat
- Silver Chrome Powder (or similar pigment)
- Small piece of makeup sponge
- Eyeshadow sponge applicator or fingertip
Tutorial:
- Base Coat: Apply a nude or light pink base coat and let it dry or cure under a UV lamp.
- Ombré: Paint the Grayish-Blue and the nude base onto a makeup sponge. Dab it gently onto your nail to create a smooth ombré effect.
- Chrome: Apply a no-wipe gel top coat and cure it under a UV lamp. Then, rub the chrome powder over the nail using an eyeshadow applicator or your fingertip.
- Seal: Apply a final layer of no-wipe top coat and cure it again to set everything.
Watch the Video Tutorial:
3. DIY Modern French Tips (The Tape & Coin Hack)
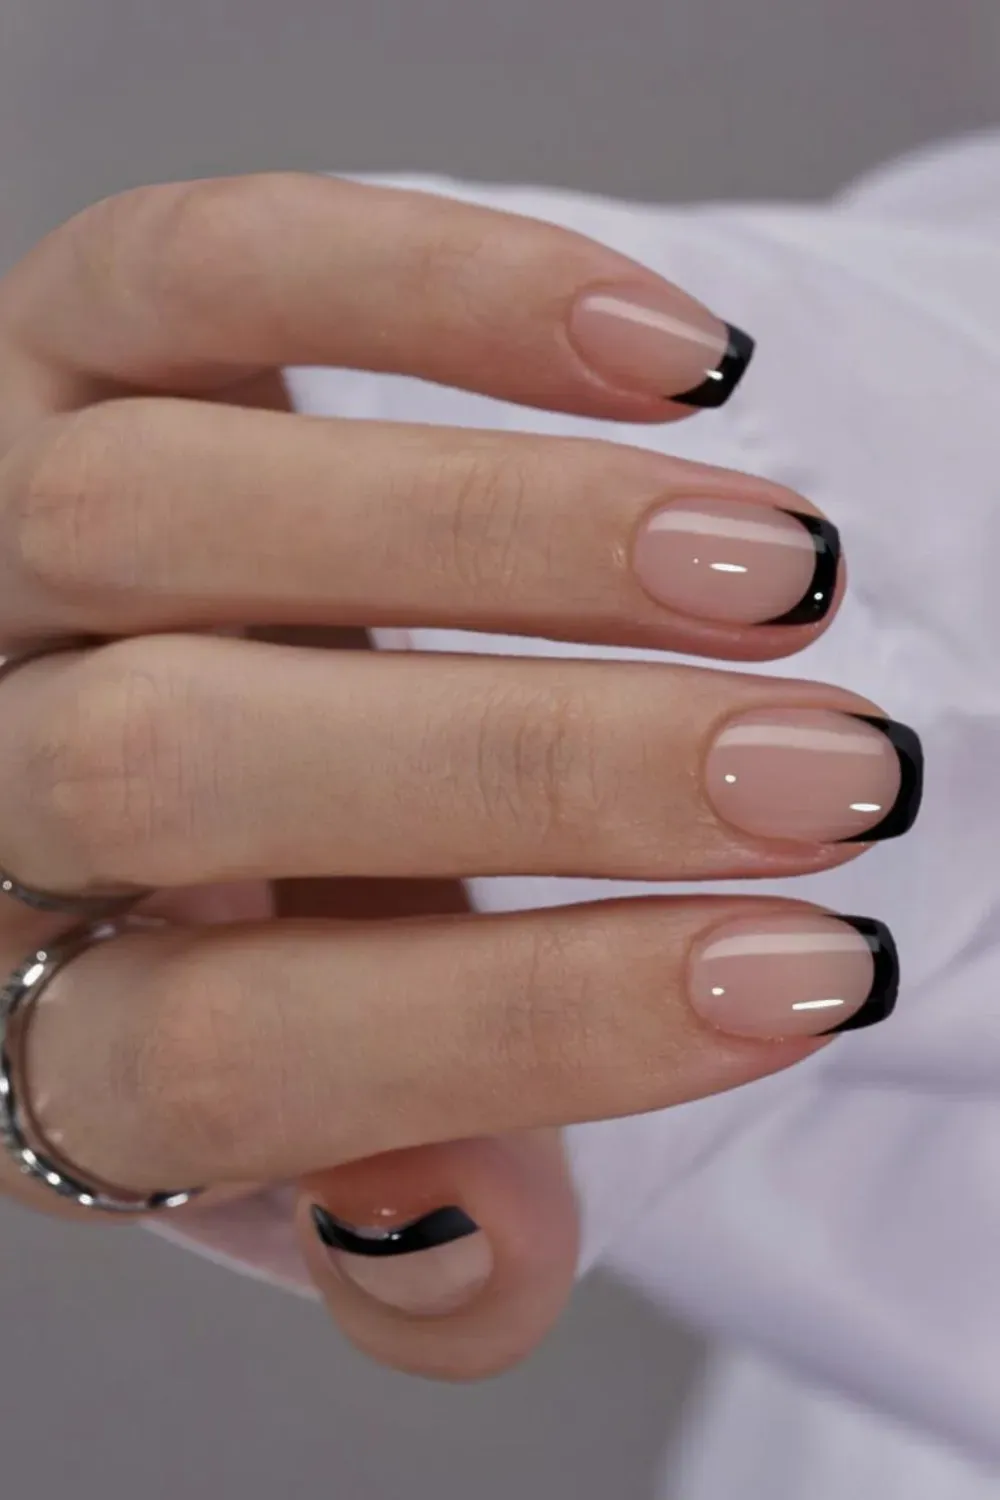
French tips don’t have to be hard to perfect! With a little tape and a coin, you can achieve that classic, clean curve every time.
What You’ll Need:
- Clear/Sheer Pink Polish (Base)
- Black Polish (Tip color)
- Top Coat
- Scotch Tape
- A dime or small coin
- Small scissors
Tutorial:
- Prep: Apply your clear or sheer pink base coat and let it dry completely.
- Sticker Guide: Place the dime on a piece of scotch tape, trace the edge, and cut out a smooth, rounded half-circle to create a custom guide.
- Position: Stick the tape on your nail, leaving only the tip exposed where you want the black polish to go.
- Paint: Apply 1-2 thin coats of black polish to the exposed tip area.
- Reveal: While the polish is still wet, carefully peel off the tape for a perfectly curved French tip.
- Refine & Seal: Clean up any edges with a thin brush dipped in acetone, and finish with a top coat.
Watch the Video Tutorial:
4. Cute & Simple Daisy Flower Dotticure
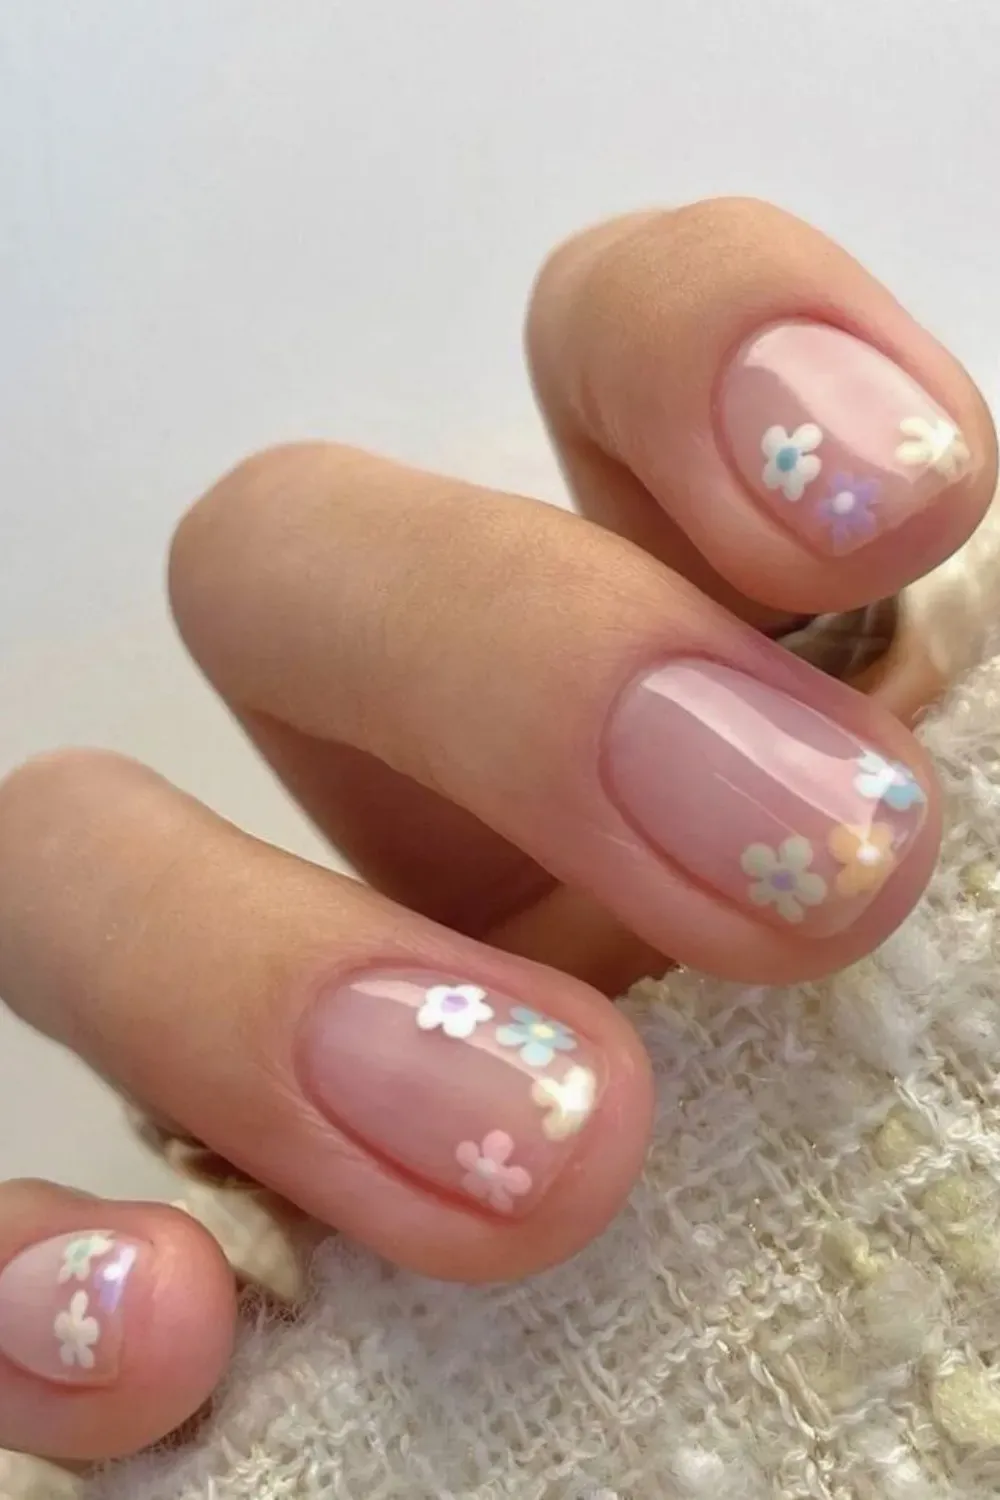
This cheerful design is a great option for short nails, and all you need is a bobby pin and a toothpick to create adorable daisy flowers.
What You’ll Need:
- Clear or sheer nude Polish (Base)
- White, Pink, Blue, Yellow Polish (for flowers)
- Base and Top Coat
- Bobby Pin
- Toothpick
Tutorial:
- Base Coat: Apply your clear or sheer nude base coat and let it dry.
- Petals: Dip the rounded end of the bobby pin into white polish, and use it to create 5 small dots in a circle pattern to form flower petals. Repeat with different colors (pink, blue, etc.) across your nails.
- Center: Use a toothpick to add a small yellow dot in the center of each flower.
- Dry & Seal: Let the design dry completely, then seal it with a clear top coat for a smooth finish.
Watch the Video Tutorial:
5. Seamless Pink Powder Ombré with Jelly Hearts
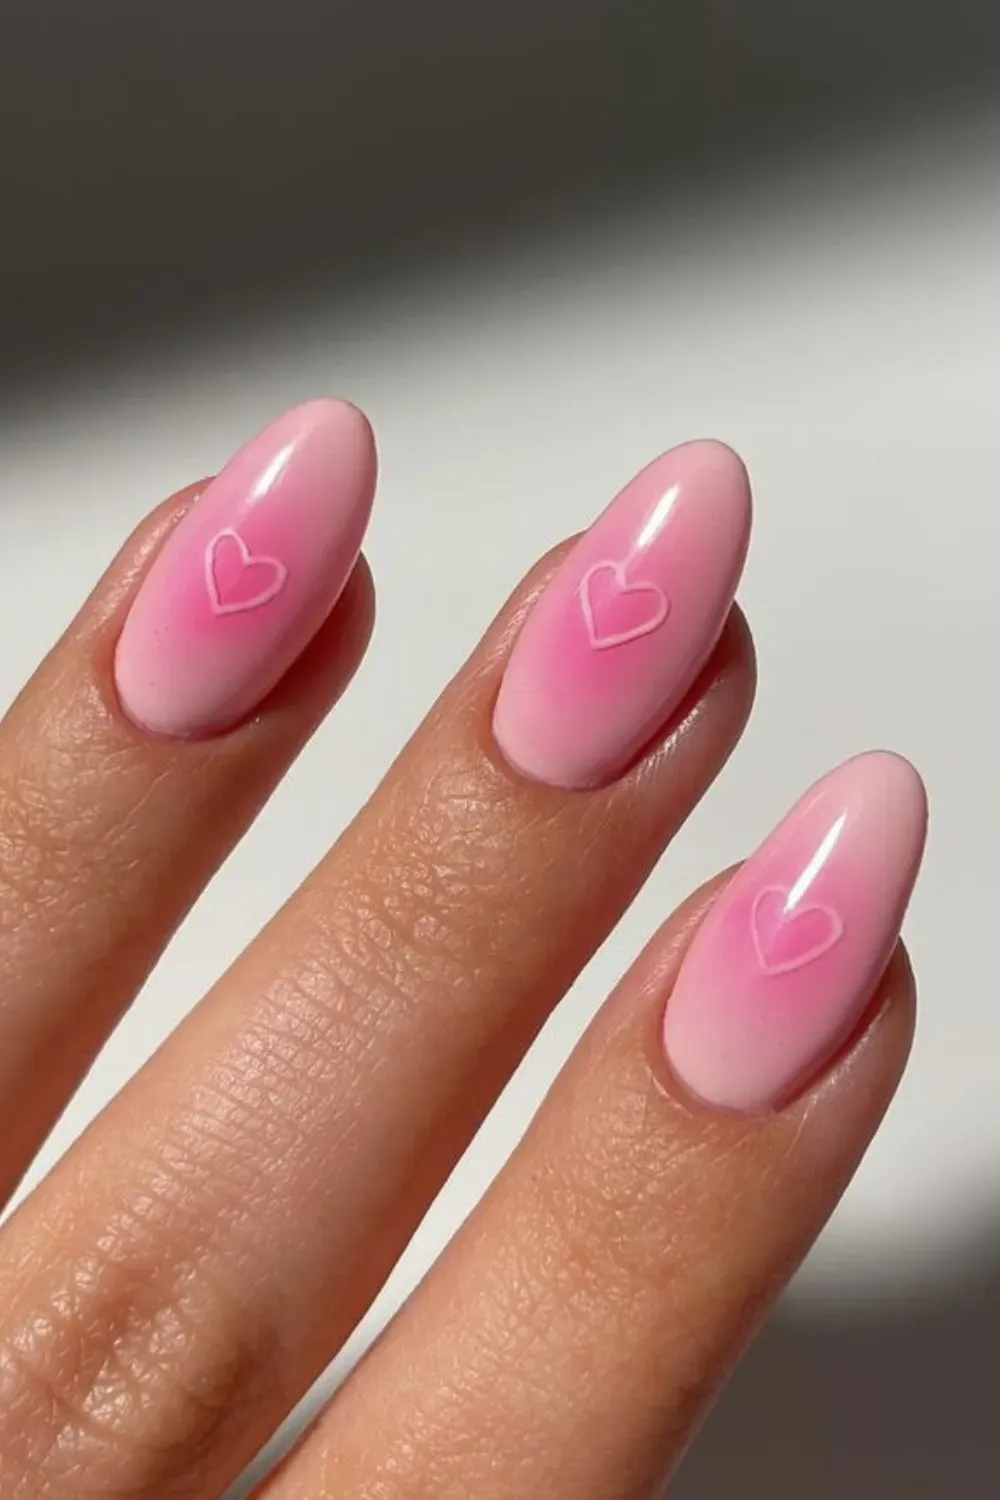
This sweet design combines the soft gradient of a powder ombré with adorable jelly hearts for a fun, dimensional look.
What You’ll Need:
- Bright Pink Polish (Base & Heart Outline)
- Lighter Pink Eyeshadow or Setting Powder (for ombré)
- Sheer Pink Top Coat or Builder Gel
- Small Blending Brush (like a blush or eyeshadow brush)
- Small Detail Brush
Tutorial:
- Base Coat: Apply the bright pink polish as your base and let it dry or cure.
- Ombré Powder: Using a fluffy brush, dip into a light pink eyeshadow or setting powder and gently dust it onto the nail. Focus on the cuticle area and blend it toward the tip for a soft ombré effect.
- Jelly Hearts: Apply a thin layer of sheer pink top coat or builder gel. While it’s still wet, use a detail brush to outline a small heart with bright pink polish. The surrounding gel will give the heart a soft, “jelly” look.
- Cure & Seal: Cure the nail under a UV lamp, then apply a final layer of top coat to finish.
Watch the Video Tutorial
With just a few household tools and a little creativity, you can achieve stunning, salon-quality nail art without ever leaving your house. These easy DIY hacks are fun to try and will have you feeling like a pro in no time. So grab your polish and get ready to create some seriously impressive designs! ✨